Writing a Check
Your checks will usually be personalized, with your name, address and phone number. Having this information printed on your check makes others feel more comfortable about accepting it. Also, the bank’s name and information, along with a check number and other electronic-looking numbers will be pre-printed on the check.
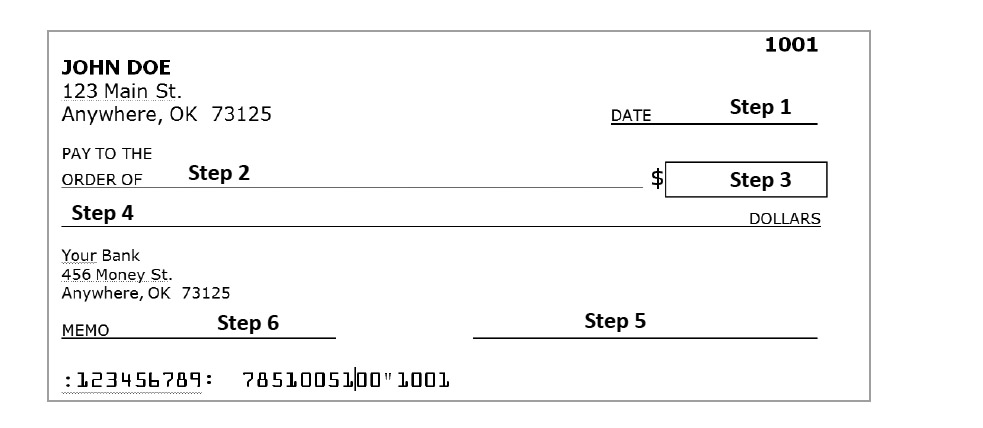
Never have your Social Security Number or Driver’s License number printed on your check. That gives someone too much information about you and helps to protect you against identity theft. A check is a legal document and must be filled in correctly; otherwise, the bank or other businesses may refuse to accept it as payment. Following are the five basic steps to follow when writing a check:
Step 1:
Write the date in the upper right hand corner. You can use any format for the date as long as it can be read. Use the current date; do not write a check for a future date (called a postdated check).
Step 2:
Write the name of the person or company receiving your check on the line that starts with “Pay to the Order of” or “Payable to.” This person or company is called the “payee.”
Step 3:
Write the dollar amount of the check in numbers in the small space that starts with a dollar sign ($) so that it reads like this: $125.76.
Step 4:
Write the same amount using words for whole dollar amounts and a fraction for the cents on the line ending with the word “Dollars.” Also, be sure to draw a straight line to fill up the remaining space on the line. It should look like this: One hundred twenty-five and 76/100 ------------- Dollars.
|
Step 5:
Sign your name on the signature line at the lower right. Step 6: If making a payment like a credit card bill or cell phone bill, write your account number on the line following Memo. This line can also be used for any other special notations that need to be made on the check. The next two steps are just as important as what you write on your check. They involve knowing how to correctly record your check in your “check register” or “check ledger,” a booklet that comes with your preprinted checks. Taking one minute to write down this information may save you a lot of money and prevent you from paying fees for writing checks or using your debit card when there is not enough money in your account. Step 7: Write down the check number, date, payee and amount in the check register or ledger at the front of your checkbook. Also including the ATM transaction number is applicable. Step 8: Subtract the amount of the check so you will know how much you have left in your account. See Recordkeeping 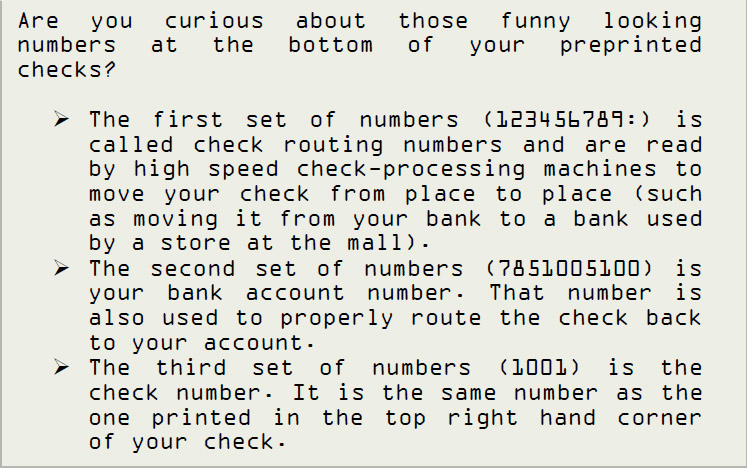
|
